
Switches, Motion Detection and Voice Control
It happens that I sometimes need to design custom solution to an idea. This time it’s a working concept of dimmable GU10 LED lights within a room. Lamps will be controllable by momentary light switches on the walls and automations run on Home Assistant OS via WiFi. The additional idea of motion detection using Philips HUE sensor (without the use of the Philips bridge) will be achieved using Conbee II gateway and Zigbee Home Automation (ZHA) integration. There will be voice control on top of everything, with the use of Google Assistant integration.
Functionality
Overview and Wiring Diagrams
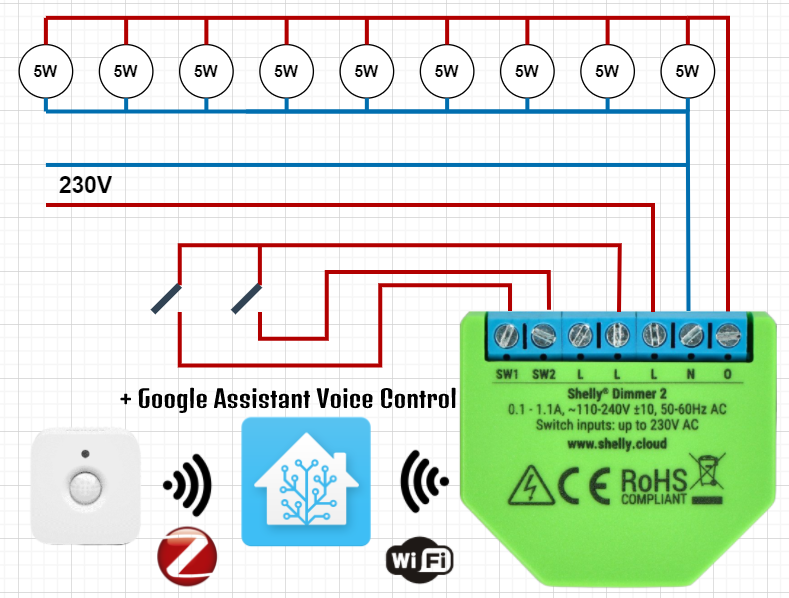
This simple schematics represents the correct wiring using two momentary switches and gives an overview on the communication protocols used – Zigbee and WiFi.
Light Control Using Home Assistant OS Interconnecting Shelly WiFi And Zigbee
One of the advantages of momentary light switches and Shelly modules is we can use unlimited amount of switches wired in parallel. There is no need for any intermediate switches, just run additional conductor from any line terminal on the Shelly to the light switch and back to the SW1 or SW2 – it is that easy!
How To Add More Light Switches In Parallel
There is no need to buy expensive intermediate switches. With momentary light switches, it is as easy as connecting them in parallel to the same terminals. Yes, you can have hundreds to control a single lamp.
Here is how to wire multiple switches in parallel:

Wiring multiple light switches in parallel to Shelly Dimmer 2

Components
GU10 LED Lamps
Philips CorePro 5W compatible with Shelly Dimmer 2
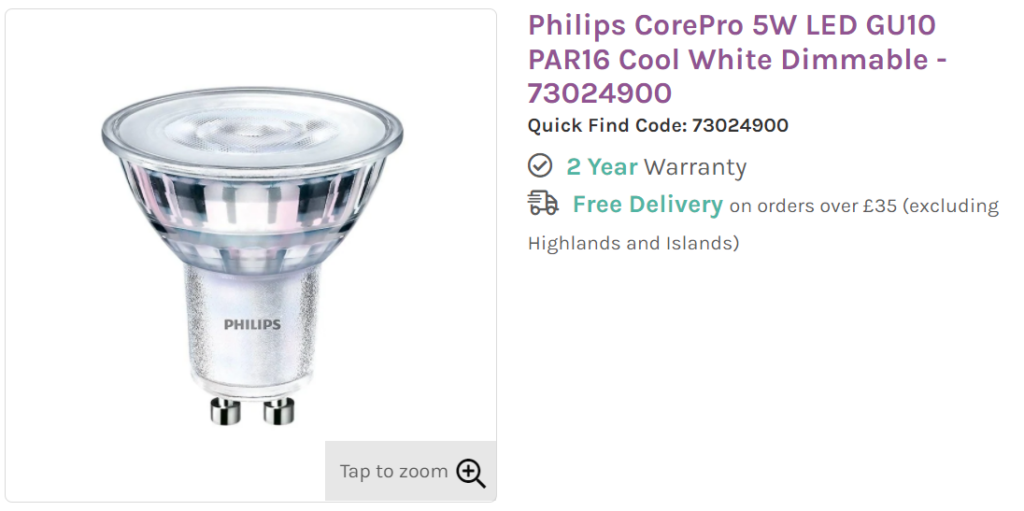
There will be different number of light units at different locations, but for the purpose of the working concept I will be testing maximum number of 9 LED lamps.
It is important to note that compatible bulbs must be used, otherwise you might run into overtemperature issues. This will be discussed later on.
I will be using Philips CorePro 5W LED GU10 PAR16 Cool White Dimmable Lamps.
Links:
www.ledbulbs.co.uk/products/philips-5w-led-gu10-par16-cool-white-dimmable-73024900
Momentary Switches
Retractive or momentary or impulse switches offer better customization
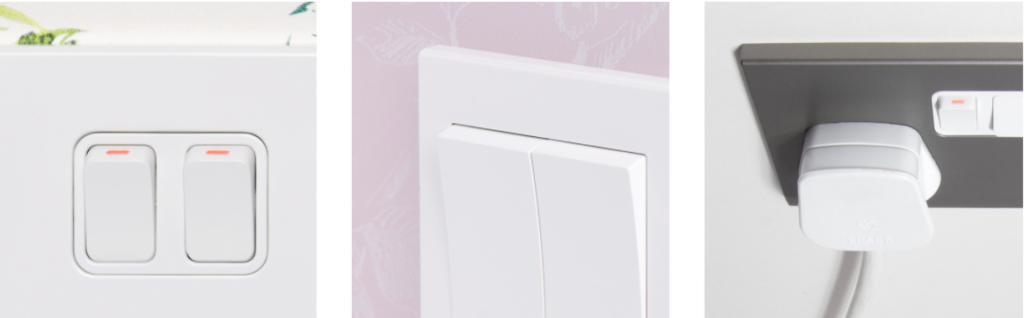
For the purpose of the setup, momentary switches are used. They look like normal light switches, but are spring loaded. This allows to send a single or multi impulses when the switch is operated. It allows for additional control, for example:
- single press – turn on
- single press – turn off
- double press – full brightness when turned on
- hold first time when turned on – decrease brightness
- hold second time when turned on – increase brightness
I have selected switches made in the UK, because of quick delivery and good quality. It is worth mentioning that the customer service of RetroTouch is very helpful and understands fully this kind of a setup, so they are more likely to offer better advice in terms of home automation.
Links:
https://www.retrotouch.co.uk/simplicity.html
https://www.ebay.co.uk/itm/291427825299?hash=item43da73b693:g:AGwAAOSwcdBWTD49
Shelly Dimmer 2
Shelly Dimmer 2 uses WIFI protocol to connect to the network

Shelly modules are RoHS compliant and offers magnitude of fun for any smart home enthusiasts. Shelly interface with the home network using WiFi protocol and works through integrations available within Hassio, but it is also possible to integrate them using MQTT (for example Mosquitto broker).
Shelly Dimmer 2 module is able to drive the LED lamps when SW1 and SW2 inputs are activated through momentary switches. On top of that, control payloads can be send over WiFi to schedule automations without user interactions. For example:
- maximum brightness after sunset decreases
- when TV is switched on at specific location (e.g. living room) – dim the lights
- activate all lights when alarm is armed while nobody is at home
- use any other input (residents location, temperatures, motion detection, time, luminace, tv channel selected, music playing in the background) as signal for action on Shelly
The sky is the limit. In this case, we will integrate other type of protocol, Zigbee, to trigger Shelly.
As mentioned above, compatible lamps must be used, otherwise Shelly’s inbuilt overtemperature detection will be set off. This is explained below in dedicated paragraph.
It is highly recommended to support the designers and manufacturers and buy from them, as you will later find out that there are fake modules on the market which don’t function correctly or can even cause fire risks! Just buy genuine stuff for a peace of mind.
Links:
https://shop.shelly.cloud/shelly-dimmer-2-wifi-smart-home-automation#136
Philips HUE Motion Sensor (without the bridge)
Philips HUE Motion Sensor over Zigbee protocol – without the bridge – Home Assistant

Additional functionality is added in several locations by the use of motion sensing. This is achieved by the excellent HUE Motion Sensor. It is small and has great build quality. The reaction to inputs is nearly instant when used over Zigbee protocol and Conbee II dongle.
All communications with the motion sensor are done without the HUE bridge through a dedicated USB dongle discussed below.
HUE Motion Sensor also offers temperature sensor readings.
Links:
https://www.argos.co.uk/product/7434435
Conbee II Zigbee (ZHA)
Conbee II is one of the best Zigbee gateways
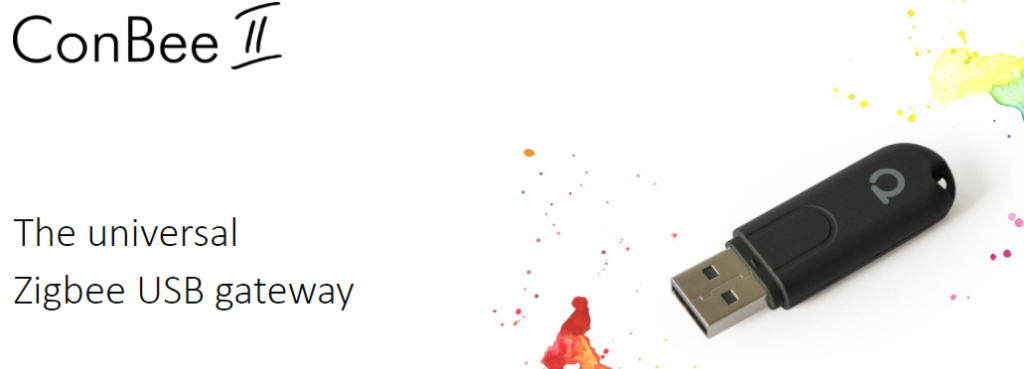
There are few Zigbee USB gateways out there, but Conbee II is one of the best. It offers great functionality and performance for a decent price. You have to consider Zigbee as one of alternative methods to decrease WiFi traffic from your smart devices to the access points. Conbee II will work as gateway, so everything using Zigbee protocol will connect to it. It is seamless integration and works excellent.
Links:
https://www.ebay.co.uk/p/19035272967
Home Assistant
Proxmox Virtual Machine with Home Assistant OS 7.0 Version 2021.12.4
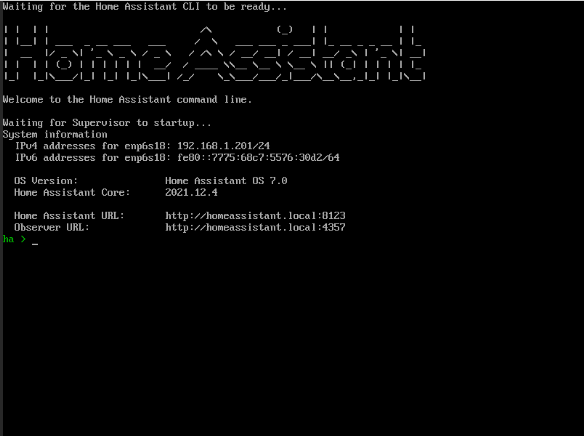
Home Assistant OS is a minimal system optimized to power Home Assistant. It comes with Supervisor to manage Home Assistant Core and Add-ons. It is the recommended way of approaching home automation.
If you already have supervisor installed, for example, the great Proxmox, you can use a helpful script from GitHub to create a virtual machine with Home Assistant.
https://github.com/whiskerz007/proxmox_hassos_install
Here is a link for Proxmox and everything you need to know about it.
https://www.proxmox.com/en/proxmox-ve/get-started
Integrations and Add-ons
ZHA (Zigbee Home Automation)
Home assistant with supervisor offers official integrations, for example, Shelly, HUE etc. It also has option to install advances add-ons. In this case, I have tested multiple options and decided to go with something that would ensure less maintenance effort.
To integrate Zigbee devices, like the HUE Motion Sensor, I used ZHA integration with compatible Conbee II gateway. There are many radio modules that can be used here. Just visit the link below for all available hardware and more in depth explanation.
https://www.home-assistant.io/integrations/zha
Shelly Integration
Fastest and easiest way to integrate all your Shelly devices with Home Assistant? Official Shelly integration. It is reliable and super fast. Shelly integration features auto discover mode. The setup is fairly easy and described in every module’s manual. It usually consists of powering up the module and connecting to its service WiFi network, then connecting to exposed web portal, where you can setup everything.
https://www.home-assistant.io/integrations/shelly
Google Assistant
Google integration is just an additional bonus. With manual control using light switches on the wall, automation from Home Assistant, HUE motion detector presence – voice control will get this simple project even further. It allows to control things via Google Assistant on your mobile, tablet or Google Home device.
https://www.home-assistant.io/integrations/google_assistant/
Building The Prototype For Testing
Smart Home Lighting Prototype Idea
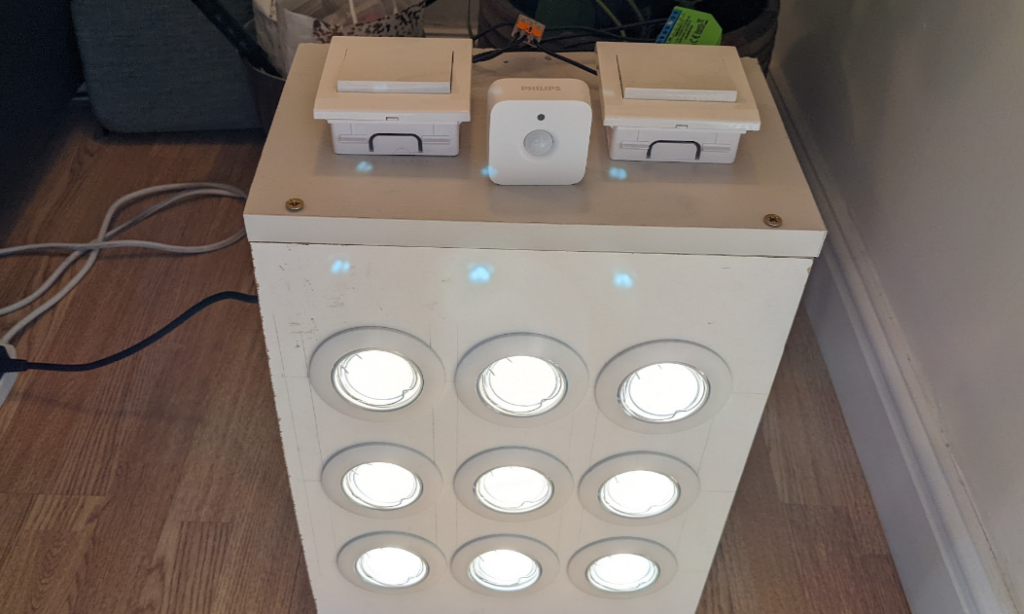
I have build a simple prototype using above components – not the best looking one to be honest, but it does the job nicely and allows for quick adjustments to wiring. It has two retractive switches which can turn on / off the lamps, change brightness when long pressed. Lamps can also be activated by the motion detection provided by the Philips Motion Sensor. Everything integrates with Google Assistant and can be controlled by voice commands or from the Google Home app.
Issues
During the design and then construction, I have ran into few issues. I recommend using Wago terminals for quicker rewiring while troubleshooting and changing connections.
https://www.screwfix.com/p/wago-32a-3-way-lever-connector-50-pack/2803r
https://www.toolstation.com/wago-221-2-way-compact-lever-connectors/p50675
LED Lamps Compatibility
Shelly Dimmer 2 is an excellent device that works with majority of LED lamps on the market. Unfortunately it doesn’t work with Aurora ones. Specifically, the model below, but I recon the driver board in these is similar across the range and will cause issues when paired with Shelly:
Aurora Enlite 4W LED GU10 PAR16 Cool White Dimmable – EN-DGU004/40
These lamps are very good quality and look top notch, so they might be a preferred choice when shopping around, but not in this case. I still recommend them for normal usage as they are just one of the best looking on the market.
The issue had been discussed with Shelly’s CEO, Dimitar Dimitrov. I did in depth testing using simple Python script. The Aurora lamps would work flawless at first glance, but also for specific period of time – approximately 15-20 minutes – then they would cause Shelly Dimmer 2 to cut off due to overheating. Dimmer 2 has inbuilt overheating protection.
To analyse the issue I have used the code below:
### Shelly Dimmer 2 Plotter
### Temperature / Brightness over Time
### SpawnTerror 2021

import datetime as dt
import matplotlib.pyplot as plt
import matplotlib.animation as animation


from urllib.request import urlopen
from datetime import datetime
import json
import time

# Create figure for plotting / variables
fig = plt.figure()
ax = fig.add_subplot(1, 1, 1)
xs = []
ys = []
ys2 = []

# Shelly IP / update interval
update_interval = 10000
url = "http://192.168.1.230/status"

# Gui info
fig.text(0.5, 0.92, "Shelly Dimmer 2 Plotter", ha="center", va="bottom", size="medium",color="black")
fig.text(0.40, 0.89, "Temperature", ha="center", va="bottom", size="medium",color="red")
fig.text(0.5, 0.89, " & ", ha="center", va="bottom", size="medium")
fig.text(0.60,0.89,"Brightness", ha="center", va="bottom", size="medium",color="blue")
fig.text(0.13,0.15,'URL: ' + url + '.' , ha="left", va="bottom", size="medium",color="black")
fig.text(0.13,0.12,'Start time: ' + dt.datetime.now().strftime('%H:%M:%S') + '.' , ha="left", va="bottom", size="medium",color="black")
fig.text(0.13,0.09,'Update interval: ' + str(update_interval)[0:2] + 's.' , ha="left", va="bottom", size="medium",color="black")


# Animate function
def animate(i, xs, ys):

    # Read temperature (Celsius) from TMP102
    response = urlopen(url)
    data = json.loads(response.read())
    tempe_values = data['tmp']
    temperature = tempe_values['tC']
    light_values = data['lights']
    light_read = light_values[0]
    brightness = light_read['brightness']
    plt.pause(0.001)

    # Add x and y to lists
    xs.append(dt.datetime.now().strftime('%M:%S'))
    ys.append(temperature)
    ys2.append(brightness)

    # Draw x and y lists
    ax.plot(xs, ys, color='red')
    ax.plot(xs, ys2, color='blue')

    # Format plot
    plt.xticks(rotation=45, ha='right')
    plt.subplots_adjust(bottom=0.30)
    plt.ylabel('Temperature (C)')

# Set up plot to call animate() function periodically
runtime = animation.FuncAnimation(fig, animate, fargs=(xs, ys), interval=update_interval)
plt.show()
This script will allow for plotting the Dimmer 2 temperature against the brightness levels. It is available on GitHub:
https://github.com/SpawnTerror/shelly-dimmer-2-temperature-monitor
During the functional tests, I could see the initial temperature of Dimmer 2 sitting at 65°C with 100% brightness. This already indicated problem somewhere as the full brightness working temperature should be way lower! Any attempt to decrease brightness would cause Shelly module to ramp up the temperature of the unit. I was able to pinpoint that 80% brightness would overheat the Dimmer 2 module within approximately 20 minutes with temperatures exceeding 100°C.
I have reached out to Shelly Support Group, but I couldn’t find any help. The next step was to talk to Dimitar Dimitrov. He confirmed that Aurora brand is definitely causing issues with the Dimmer 2, which was the final argument to start testing other brands.
It is important to note that the tests were completed using all possible combinations of settings available on the Dimmer 2 UI. Leading and trailing edge and also endless auto calibration. All results and graphs were indicating high initial temperatures and roughly 20 minutes run time finished with overheating error. The power consumption reported wasn’t giving away any hints that there is something wrong, until the temperatures went over the limit.
I have acquired Philips CorePRO series LED lamps and continued testing using the script. You can clearly see on the graph below, that the initial temperature of the Dimmer 2 module wired to Philips lamps is below 40°C. What a difference!
On the graph below, blue line corresponds to brightness and red line is module’s temperature, both are real time readings scrapped from ‘IP/status’ json data:
Shelly Dimmer 2 Temperature Issues Resolved

In the end, Dimmer 2 wasn’t to blame, but the Aurora range lamps. Using Philips CorePRO and few other brands allowed the Shelly module to work within 40°C range at all times, no matter the brightness value.
I have to once again praise Shelly’s team for instant help with troubleshooting and their offer to send different modules in case any more issues.
During the testing, one of 16 Dimmer 2 modules I had, was bought from Amazon’s reseller, the other 15 came from Shelly UK store. The one from Amazon, sold as brand new, was running at constant 90°C during tests on Aurora and Philips lamps. We have concluded that the unit is fake or damaged, but instead of sending it back, I have decided to keep it – to investigate the board inside the unit and do further analysis.
Power Loss And Reconnection
The one Shelly module that didn’t come from official store caused more headaches. When simulating power loss, reconnection time and behavior of the Dimmer 2, it wouldn’t come back to life nor retain the settings. It could have been a dodgy unit sold as brand new or simply a counterfeit item. None of the 15 modules received from Shelly and tested afterwards repeated this behavior.
The problematic unit would revert to exposing the service WiFi access point and all the settings would be lost. This is unacceptable and rendered it no fit for purpose. I have kept the unit to investigate the problem further.
Demonstration and Performance
The whole setup performs above expectations. The ZHA (Zigbee Home Automation) runs flawless and the delay over Conbee II gateway to Home Assistant is within milliseconds. The HUE Motion sensor looks fantastic and triggers instantly, even if located upstairs, behind two closed doors and few walls.
This setup ensures that in case of wireless connection issues, lighting can still be operated by physical momentary switches. All connections are local, except the additional integration of Google Assistant on top of everything – this allows for voice control.
To sum up, all the lamps can be controlled via:
- motion detection
- voice control
- physical, retractive switches (as many as you need – wired in parallel, no intermediate switches)
- unlimited automation scripts (weather, luminosity, geo location, the options are endless)
Shelly Dimmer 2 works perfectly as it still sits in the testbench and it has been over 6 months now. I have definitely simulated over 10 power cuts since then, simply disconnecting everything from the power to see if all devices will come back online after. So far I have found zero issues and it definitely gives hope that it will run great once installed inside the back boxes.