
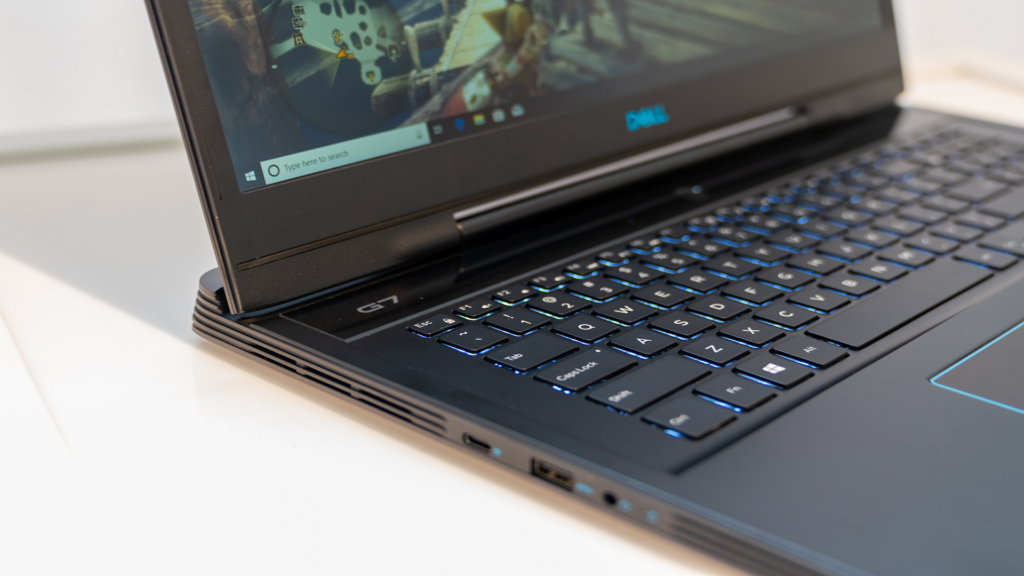
Overheating & Noise
Your laptop might develop overheating and / or noise issues over time. It could very well have these problems from the start (gaming laptops). You can very easily get the temperatures down by 5-8° by repasting the CPU and GPU. If you experience more dramatic noise from the fans, it could possibly mean that the bearing is damaged (it is no longer balanced and is making specific ‘rattling’ sound) and the whole fan unit needs to be replaced. Read more for advice how to correctly approach replacing thermal compound on your laptop and find replacement parts.
Thermal Throttling, Overheating, Fans Noise Issues
Benchmark Temperatures Before
Before we start, let’s test current IDLE and UNDER STRESS temperatures using HW Monitor and simple Throttle Stop TS Bench feature. You can grab them here:
https://www.cpuid.com/downloads/hwmonitor/hwmonitor_1.43.exe
https://www.techpowerup.com/download/techpowerup-throttlestop/
Here are the results before repasting the CPU and GPU with Thermal Paste only.

Before Repasting CPU And GPU

Thermal Paste vs Liquid Metal
It’s up to you to decide whenever to go with Liquid Metal. Your choice should be based upon whenever your laptop will be stationary or not. Liquid metal compound has tendency to move around if you don’t have some kind of seal around the CPU / GPU.
Sometimes it’s just not worth the potential physical damage to the surfaces to apply liquid metal, but if you are after extreme and best possible cooling method, then it will be the most efficient way. It is advised to have your laptop on flat surface permanently to avoid potential issues with shorting out circuits on your motherboard.
Characteristics of Liquid Metal and Thermal Paste
- liquid metal and thermal paste work the same way
- they fill microscopic gaps on the surface of your CPU / GPU and heatsink
- thermal paste is thermally conductive, usually electrically insulating
- liquid metal is thermally and electrically conductive
- thermal conductivity of thermal paste is around 4W(m*K)
- thermal conductivity of liquid metal is around 13W(m*K)
- nothing guarantees you will achieve this performance
- lifespan of both is around 3 years
- you should inspect degradation every 2 years maximum
- they are inexpensive and fairly easy to replace on most machines
Warning!

You shouldn't use liquid metal compounds on bare aluminum as it will start a chemical reaction and the gallium component will eat up the aluminium heatsink.
Preparation, Tools & Consumables
Disconnect your laptop from external power and place it upside down on your table, preferably on some cloth to avoid scratching the top. The kit I will be using to complete the task that contains everything you will need:
Thermal Grizzly Kryonaut 12.5W
If you opt in for liquid metal compound on CPU:
Thermal Grizzly TG-C-001-R – Liquid Metal
Something you should already have, if you don’t, just buy it now:
IT Dusters CompuCleaner Original Electric Air Duster
iFixit Toolkit For Electricians

Dell G7 7590 Disassembly
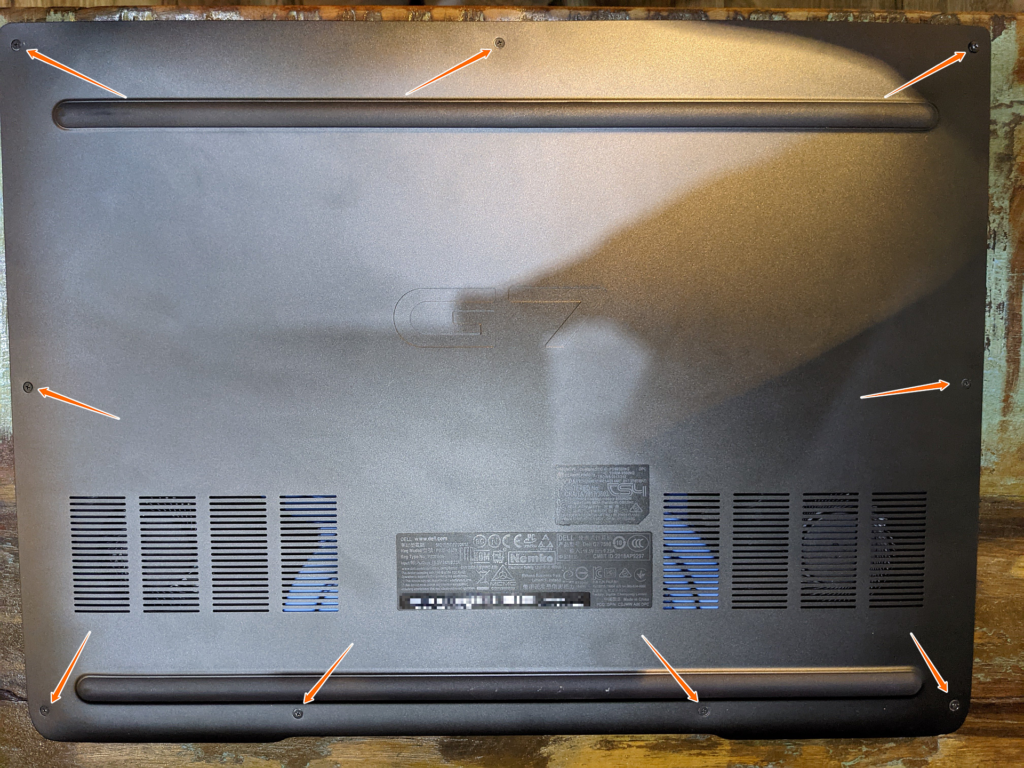
Back Cover
Place your laptop upside down on soft cloth and remove 9 screws holding the back cover.
Dell G7 7590 Back Cover 9 Screws
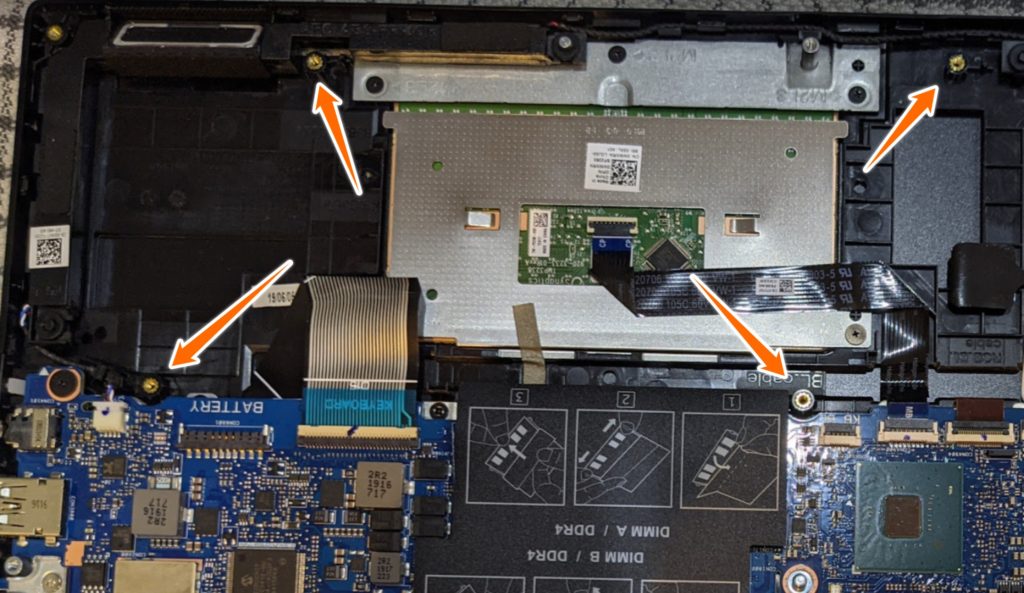
Disconnect Battery Pack
Warning!

At this point you should be wearing an electrostatic bracelet. If you experience small electric shock very often, you might damage your motherboard components by sudden electrical discharge from your body. Connection between you and the parts you are working on will ensure there is no difference in potentials, limiting the chances of discharge. You can find this tool in the tool section above. It is also good idea to work on an electrostatic mat, which is grounded and then connect your wrist strap the the mat.
Remove the connector from the motherboard using pull up strap.
Dell G7 7590 Battery Connector

Undo 4 screws holding the battery pack and remove it.
Dell G7 7590 Battery Removal
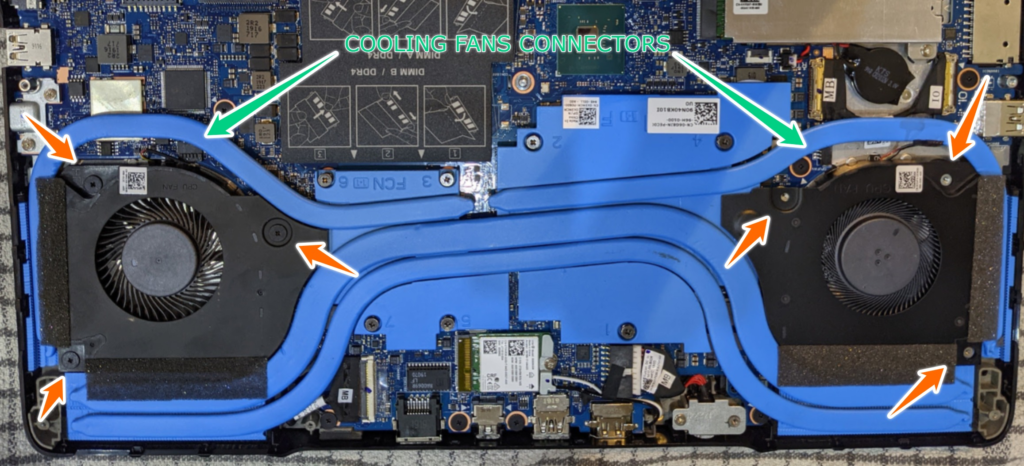
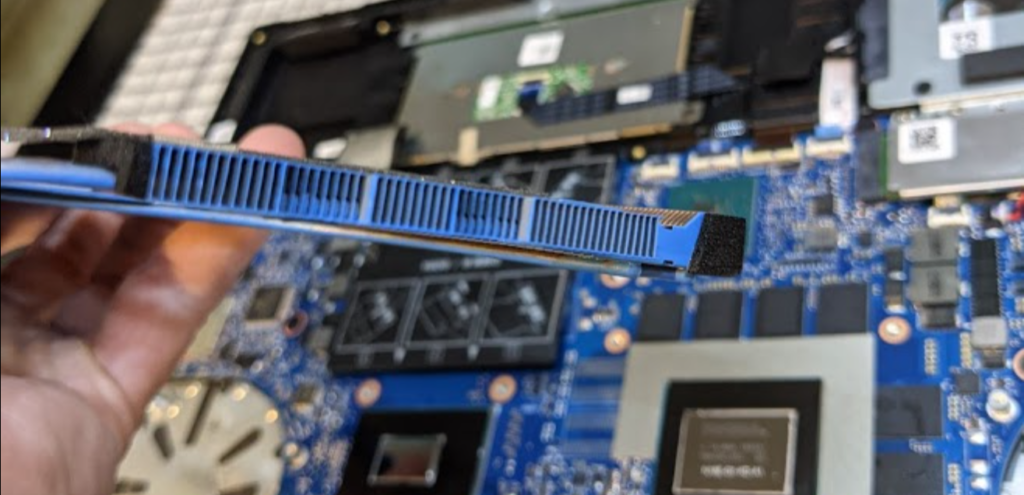
Disconnect CPU & GPU Fans
Turn your laptop with removed battery slot away from you. Blue heatsink has a cooling fan on both ends. The one on the left is CPU and on the right is GPU fan. You can confirm that by looking at the housing of the fans, it has the CPU / GPU engraved in the plastic.
Disconnecting the fans can be tricky. Use plastic opening tool from the kit above:
iFixit Opening Tool

Disconnect the wires and remove 3 screws from each fan housing.
Cooling Fan Removal CPU & GPU
Remove Heatsink
Have a look at the heatsink, it has 7 screws numbered from 1 to 7. Remove all of them in sequential order starting from 1 and lift the heatsink up.
Heatsink Removal 7 Screws

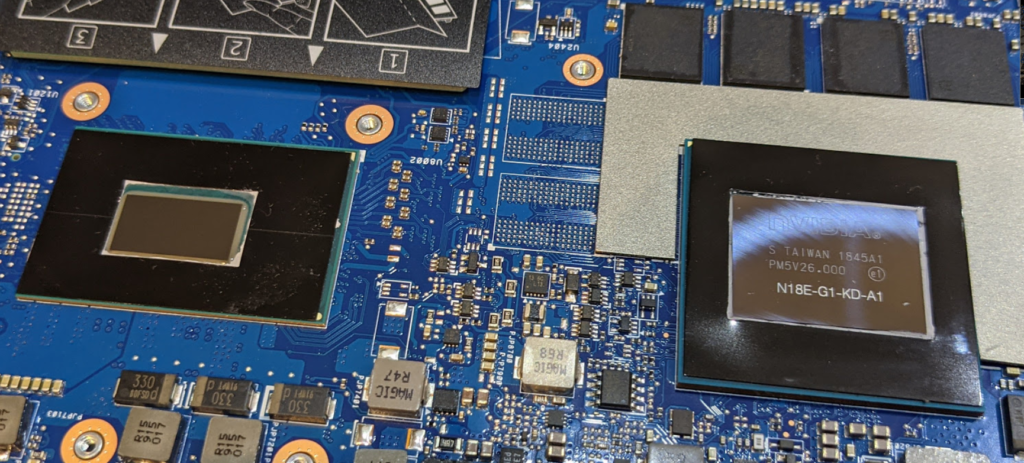
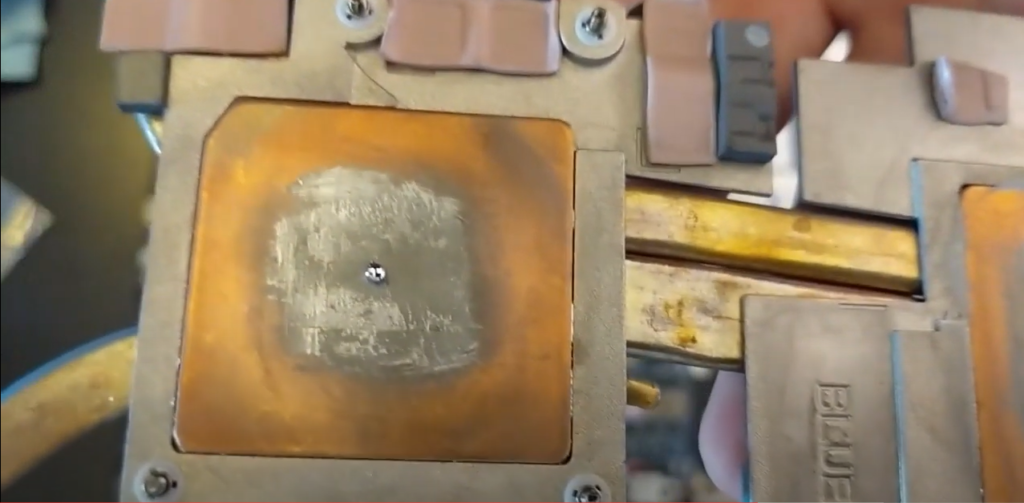
At this point you have full access to CPU and GPU. CPU is located below RAM slots on the left and GPU is the bigger one on the right.
Cleaning Parts From Dust And Old Compound
Remove Old Paste From CPU & GPU
It is guaranteed that the stuff on your CPU and GPU is thermal paste of some kind. It should come off easy. Use any mix of these to remove it:
- paper towels (to start with)
- alcohol based wipes
- Isopropyl Alcohol (to remove any fat residue before applying new thermal paste)
Inspecting And Removing Old Thermal Paste
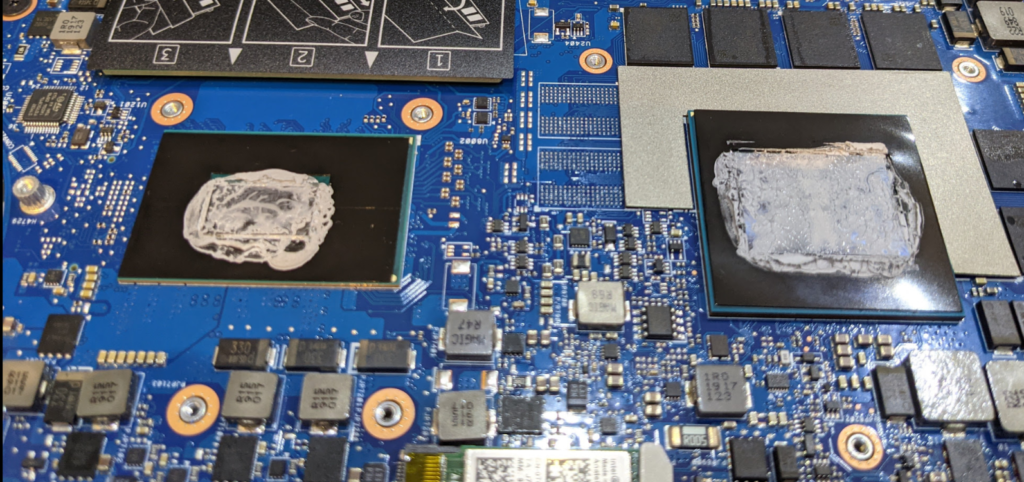
Both CPU and GPU surfaces should have no visible signs of old compound. The last step would be to use Isopropyl based liquid to remove all fat residue and prepare them for reapplying new Thermal Paste or Liquid Metal. If you really don’t have anything, you can use Nail Polish Remover, it will do the trick.
CPU And GPU Cleaned With Isopropyl
Remove Old Paste From Heatsink
Repeat the process with the heatsink and finish off with Isopropyl alcohol to prepare it for reapplying.
G7 7590 Heatsink Inspection Factory Applied Paste
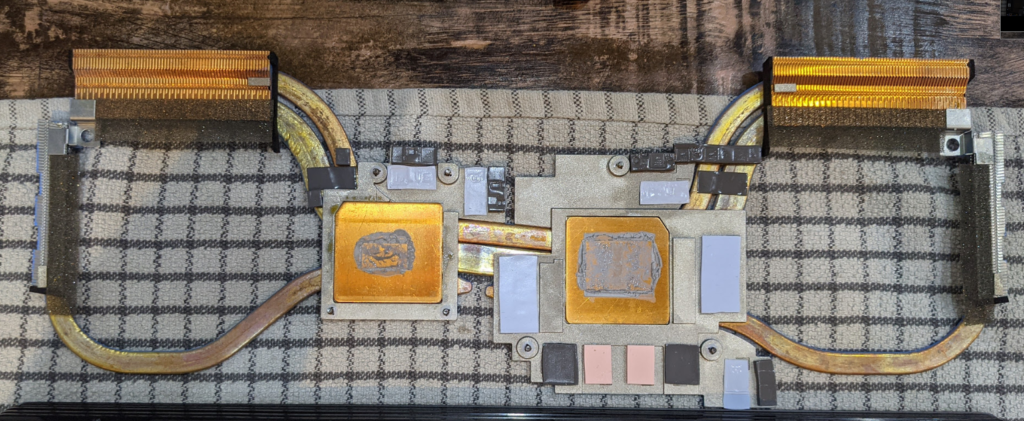
Wipe off the factory applied paste and give it a good clean with the alcohol.
Cleaned Heatsink
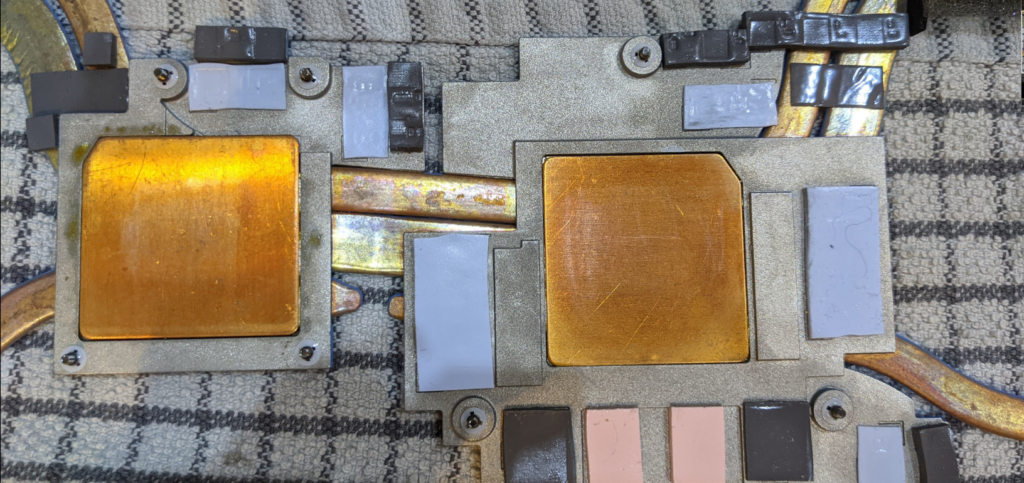
Clean The Dust From Inside Of PC And Parts
Give your motherboard a good blow of compressed air or use the powered blower from Tools section above. Remove all the dust the is hiding in the corners near the fans location, but also go over SSD and HDD sections and the battery pack. You should be doing this every 6 months to achieve the best cooling of your PC / laptop. Without a good escape points, your rigs will thermal throttle and will work with reduced performance.
To clean the fans, you should hold them gently so they don’t spin while you aim compressed air at them to reduce the chances of damaging them.
Heatsink has several points that needs to be cleaned correctly as can be seen on this photo. Make sure to give them a proper blow with air.
Cleaning Heatsink With Compressed Air
At this point everything should be free of dust and fat residue. Time to apply new Thermal Paste or Liquid Metal.
Applying New LM Or Thermal Paste
Liquid Metal Solution For CPU Only
For alternative liquid metal application on the CPU, use supplied applicator and place small dot on both heatsink and CPU.
Warning!

Liquid Metal should be applied to both, CPU surface and heatsink surface. It should be spread manually with something before assembly, like on the photos.
Amount Of Liquid Metal Needed
Spread this little amount of compound over the surface of heatsink and CPU to create a unified layer.
Liquid Metal Applied To Heatsink

Repeat the process with CPU only. For GPU part, just do normal Thermal Paste procedure below.
Information

Liquid Metal photographs belong to SRC Tech Youtube's channel and are screenshots of his fantastic video, that can be seen here.
Thermal Paste Solution For CPU & GPU
There’re many ways to apply new compound. I always go with X (cross) technique and it always worked. It is consistent in a way that it ensures maximum coverage of the surface.
Apply thermal paste in a form of crossing pattern (X), approx. 2mm wide. It’s better to have a little bit too much than not enough. There is an insulating area around GPU.
Thermal Paste Applied On The GPU

Assembly Process
Heatsink
Place heatsink gently back into position and apply very small pressure to it. Install 7 screws back in sequential order, starting from 1.
Heatsink Installation

Important!

Make sure to follow the order engraved on the heatsink. Tighten the screws from 1 to 7.
Install The fans
Connect the GPU fan’s connector first, then install it in place using 3 screws. Repeat with CPU fan on the left.
Fan Connector First
Install The Battery Pack
Insert the battery back in place and secure with 4 screws. Connect the snap-on connector on the motherboard (see photo above).
Back Cover
Put the back cover back on and secure with 9 screws. You have successfully changed your thermal compounds on CPU and GPU.
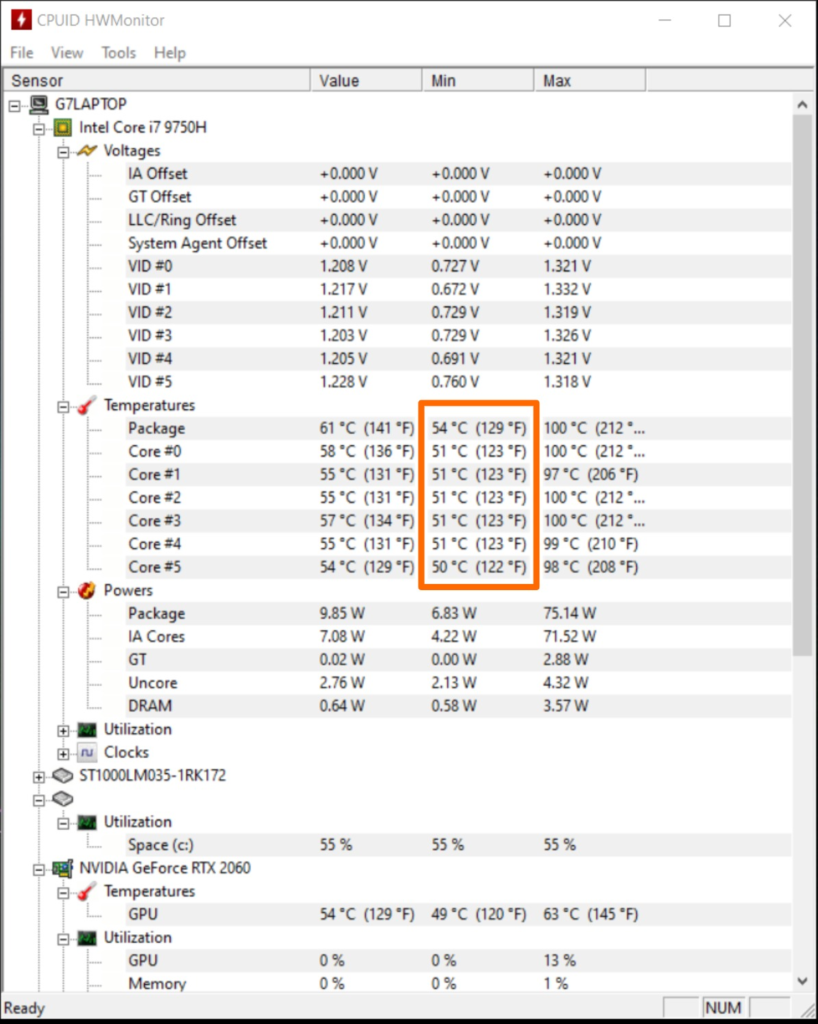
Benchmark Temperatures Afer
HW Monitor reports way lower IDLE temperatures, success.
After Repasting CPU And GPU
Before And After Repasting Comparison
| IDLE TEMPERATURES | Before | After |
|---|---|---|
| Package | 62 | 52 |
| Core 0 | 60 | 51 |
| Core 1 | 59 | 51 |
| Core 2 | 59 | 51 |
| Core 3 | 60 | 51 |
| Core 4 | 60 | 51 |
| Core 5 | 59 | 50 |
Final Thoughts
To Under-volt Or Not To Under-volt
Unfortunately, stress test temperatures are still hitting 100 degrees, which will definitely cause thermal throttling of this laptop. You can remedy this by using Thermal Throttle to under-volting your CPU by an offset of 125mV, which I will cover soon in separate article.
Alienware CC Thermal Profiles
Alienware Control Center Thermal Profiles
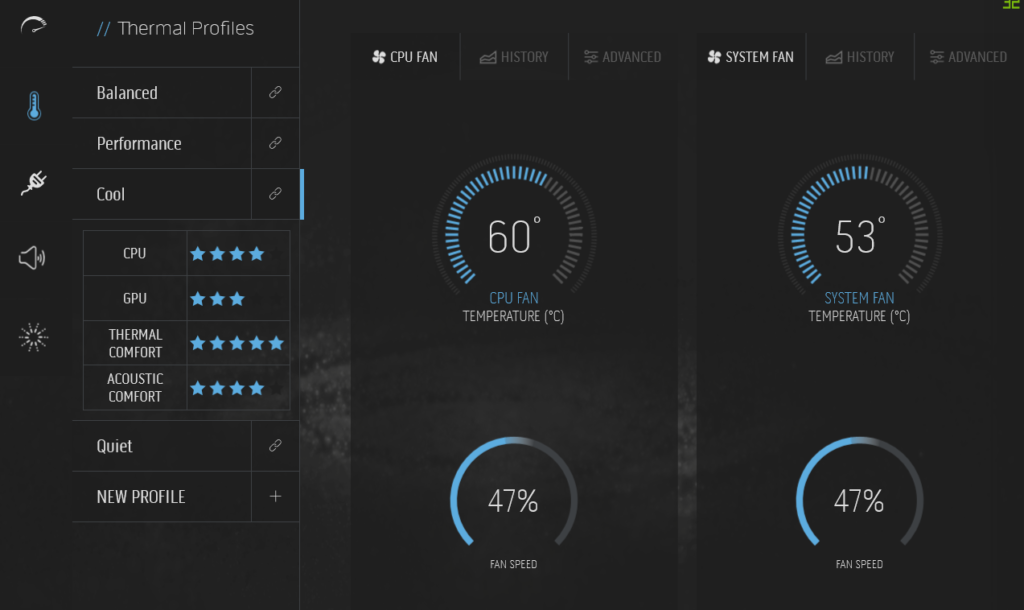
If you don’t use your G7 7590 for gaming much, but require this powerhouse to be fast and still stay cool, use the Alienware Control Center to apply Cool Profile, which will limit the maximum power draw to around 45W, thus limiting maximum temperatures to below 80 degrees. The fans won’t even kick in and you will still have excellent performance for any other task than running very demanding games.
Did this when i first bought mine over a year ago. Came across your thread while looking to replace the thermal pads as mine are damaged. I can’t find the detail for the correct thickness anywhere. You can as you say lower the voltage(which is what i have done) even gaming on full load now my laptop does not get above 84
I haven’t replaced the pads, I will repeat the whole process in a few weeks time and hopefully get the pads done this time. Thanks!